Payments - Payroll
- Former user (Deleted)
- Andrea Boehm
- Lori Miller
Payroll Payments are a list of Payroll Checks and Direct Deposits for employees that were paid. These can then be Voided, Un-voided and to Process Payments.
Check or Payment Number
By default, this grid includes the Payment number. All payments are associated with a Payment Number. Payroll Payment Checks are also assigned a Check Number during the Payroll Process.
The Direct Deposits option are a list of Direct Deposits items.
Payroll Payment Checks are the list of just checks paid to the employees. These can be Re-issued. The Print Checks option is for creating the Output Form Files for printing and the Resequence Check option is for renumbering checks if damaged or entered in wrong. The 'Old Checks' can be Voided during this time.
Refund Payments are Refund of Deductions that were paid separately from a Regular Payroll. These can be Voided and Un-voided.
The Refund Payment Checks are the list of deduction checks refunded separately from an employee's regular payroll. These can be Re-issued. The Print Checks option is for creating the Output Form Files for printing and Resequence Check option is for renumbering checks if damaged or entered in wrong. The 'Old Checks' can be Voided during this time.
How Leave balances are calculated?
Sick, Vacation or Personal Leave balances on payment stubs, come from Leave Balance screen. The Usage would come from Attendance screen, if not deferred and an absence is entered, the leave balance is updated at that time. If an employee's absence is from a prior payroll processing period and is processed on a later payroll (absence entered in Attendance), that absence will appear on their pay stub for the payroll they are processing as the entry will be pay stamped for that pay currently being processed.
For Example, when processing payroll for 8/15/22, a Sick day absence from 6/27/22 was just posted to Attendance. When the payroll was posted, the record pay stamp date reflects 8/15/22 and the employee's check stub reflects the 1 day of sick leave usage.
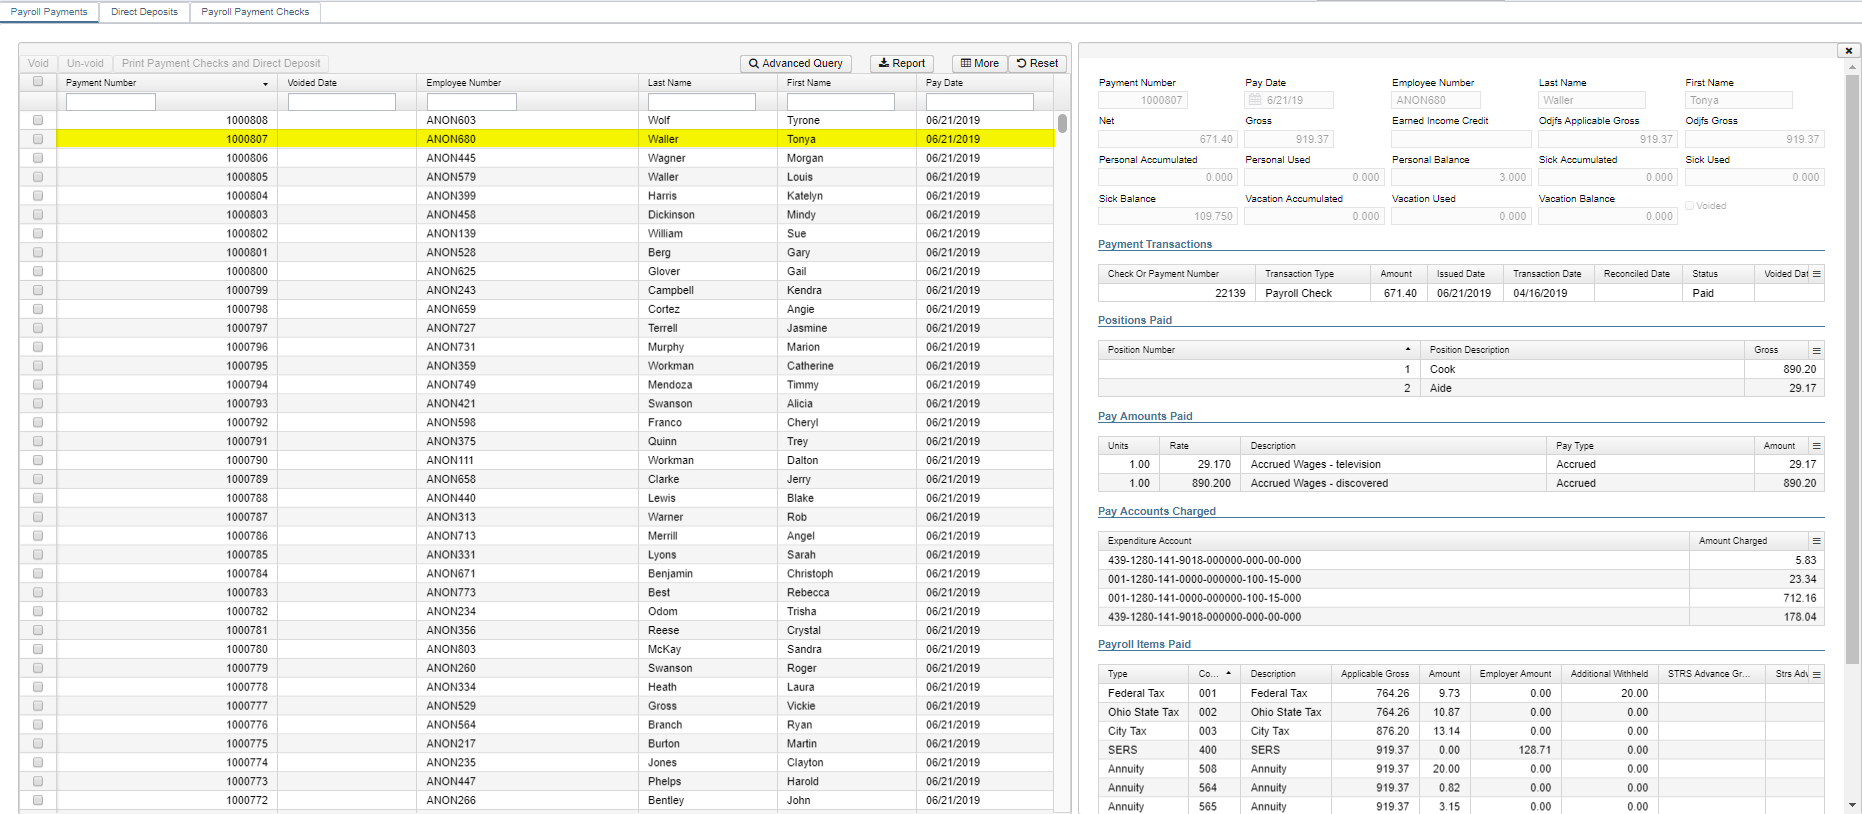
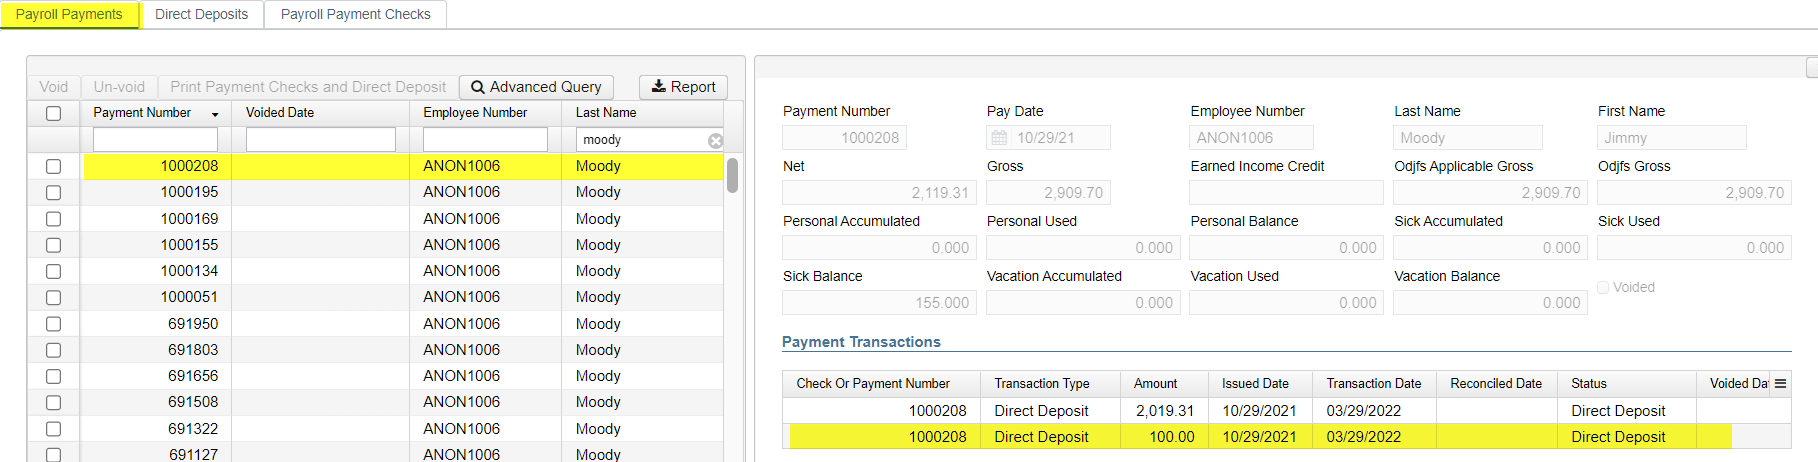
Payroll Payments
Under the Payroll Payments option, you can Void, Un-void and Print Payment Checks and Direct Deposits.

Highlighter view
Click anywhere on the employee's line to view:
Void
To void a payroll Payment, select the Payment Number and click on  . After check is voided, then go to USAS Integration and click on Payment Void/Unvoid Submission option, to post to USAS:
(Checks that are reconciled cannot be Voided)


Enter in the Void Date and click on ![]()


Un-void
To Un-void a payment, select the Payment Number and click on ![]() .
.

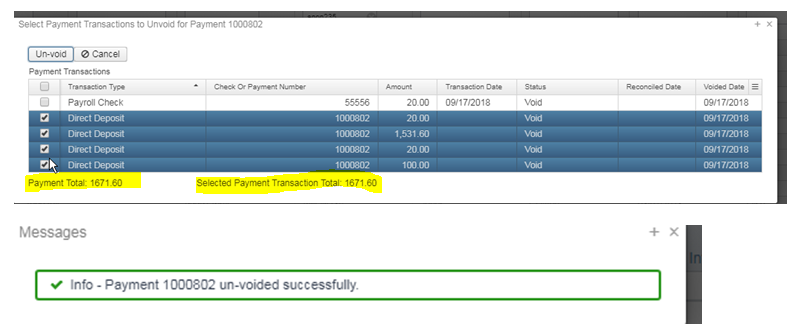
If employee has multiple Pay Distributions, a new screen will appear.
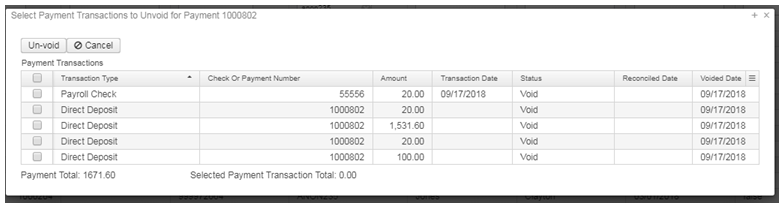
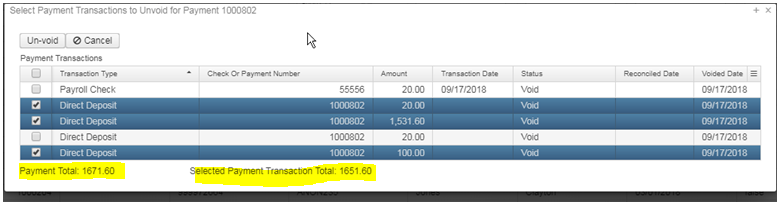
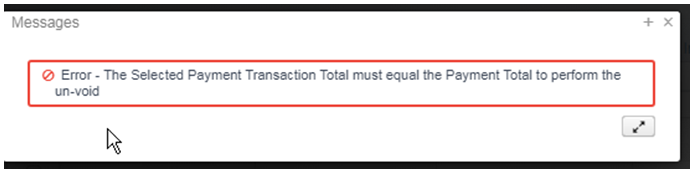
Select the Transactions to Un-void. Making sure the Payment Total and Selected payment Transaction Total equals. If not equal, an Error will occur:

Print Payment Checks and Direct Deposits
**Note** If the check is reconciled, it must be un-reconciled first, print the check and then re-reconcile it again**
Select all Checks/Direct Deposits to print and click on ![]() .
.
**NOTE** Reprinting checks here will show the Pay Stub detail**

or if wanting to reprint a single Check or Direct Deposit notice, check next to the employee and click on ![]() .
.


Processing: Checks
Direct Deposits
Output Format: XML (Export)
PDF (Print)
File Name: XML (Checks.xml) (DirectDeposits.xml)
PDF (Checks.pdf) (DirectDeposits.pdf)
Deposit Form: Select the form from the dropdown box
Check Form: Only is an option for PDF format
Memo: Add a message on the check and Direct Deposits
Once all selections have been made, click on  or to cancel select
  .
.
Example of a Direct Deposit Hourly Employee .PDF

Example of a Direct Deposit Daily Employee.PDF

Example of a Direct Deposit Hourly .XML


Example of a Payroll Payments Check Hourly Employee.pdf

Example of a Payroll Payments Check Daily Employee.pdf

Direct Deposits
The Direct Deposits option is a list of Direct Deposit items. From here you can Save or open the file:
Issue Date = Pay date
Transaction Date = System date (actual date the transaction was created)
Pay date = Pay date from the payroll

Resubmit Direct Deposits
Return of Employee's entire pay
If district needs to resubmit an employee's ACH Direct Deposit to the bank or to resubmit the Direct Deposit to a new Account Number, click on ![]() next to the employee. This will NOT void the Direct Deposit, just reissue:
next to the employee. This will NOT void the Direct Deposit, just reissue:

Enter in the new Account Number and/or Routing Number (If applicable) and select from the drop-down box, the Direct Deposit Type and click on  to create a file or click on Cancel to exit out without making changes. (Changing the Account Number and/or Routing Number on the employee's Pay Distribution, will NOT change the numbers on an existing Direct Deposit, the new numbers will need to be added):

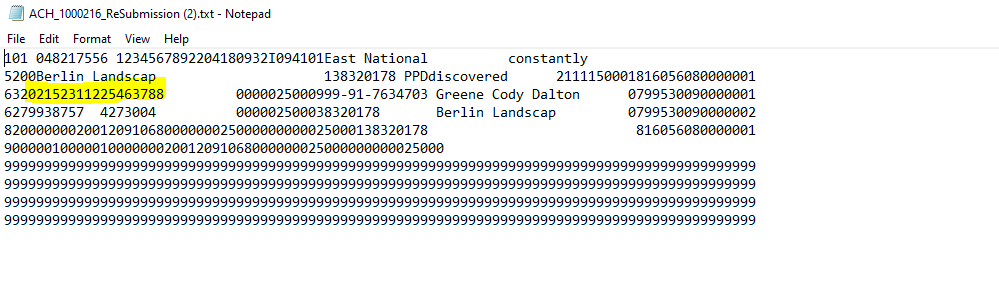
A new ACH Submission file will be created to submit to the bank:
ACH_1000083_ReSubmission.txt:
The employee's Payment Transactions will keep the same Payment Number as before, but the old payment will be voided, and the new payment will be displayed:


Partial Return as a Direct Deposit
Go to Payments/Payroll/Direct Deposit and find the Employee, Payment Number of the partial direct deposit.

To return the partial return as a Direct Deposit, click on the box next to the direct deposit Payment Number select and click on ![]()

Enter in the correct Account Number and/or Routing Number and Click on Generate File or Cancel to exit without creating a new file. (Correcting the employee's Pay Distribution, will NOT update the Account Number and/or Routing Number in the Generate ACH File below):

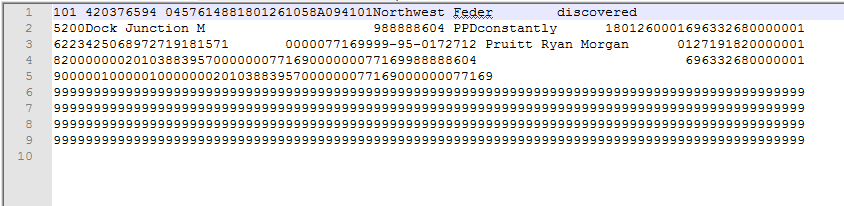
The file to send to the bank for the employee's partial Direct Deposit will look like this and contain the correct Account and Routing numbers:
The employee's Payment Transactions will keep the same Payment Number as before, but the old payment will be voided, and the new payment will be displayed:


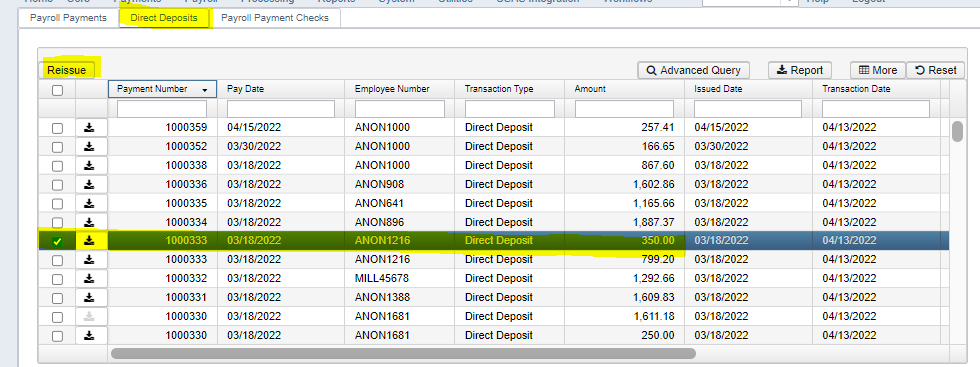
Reissue
This option is used if an employee's Bank Account was closed or had the wrong account number, the employee's entire pay or partial would be returned to the districts Payroll Clearance account.
The district has two options to reissue the money to the employee:
Void Direct Deposit & Reissue as Check
To Reissue a Direct Deposit as a check, select the employee and click on  (This will void the original check and issue a new check number, but will keep the original Payment Number)

Select a Bank Account from the dropdown box to print the new Check from and enter a Reissue Date. Click on Generate File or Cancel to Exit:
A Print checks option will be created:

Select the employee and click on  :
:

Enter in the Printing selections:
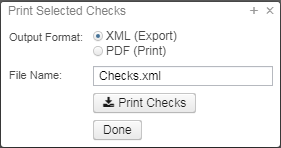
Print Selected Checks options:
Output Format: .XML (Export)
.PDF (Print)
File Name: Checks.xml
Checks.pdf
Form: Select from drop down what form file to use to print the check (Only for PDF Output Format)
Click on  to create printing file or Done to exit out.
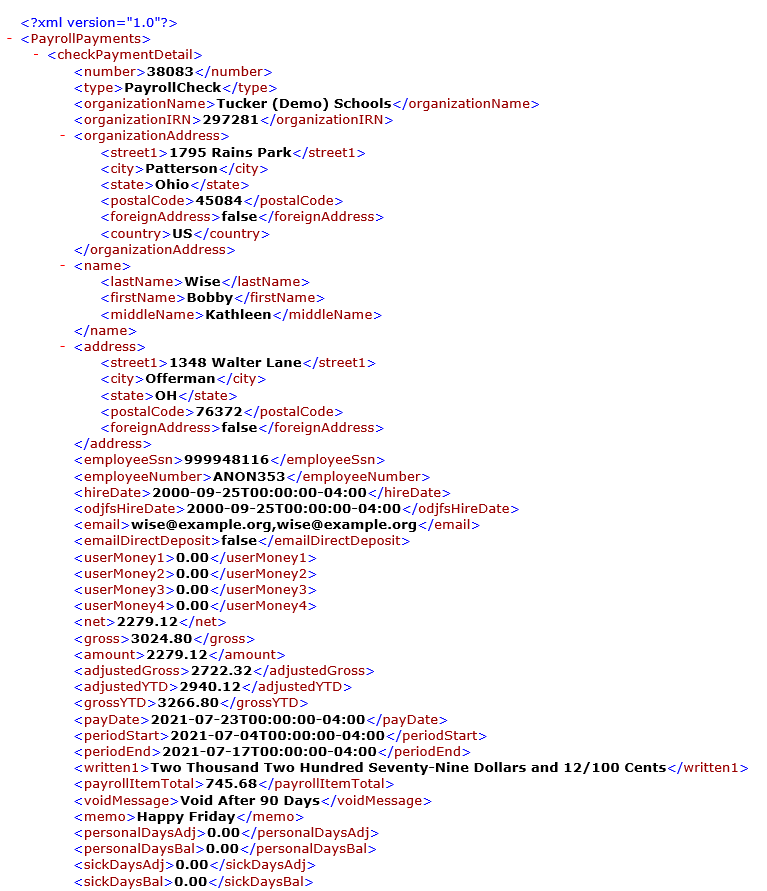
Checks.XML example


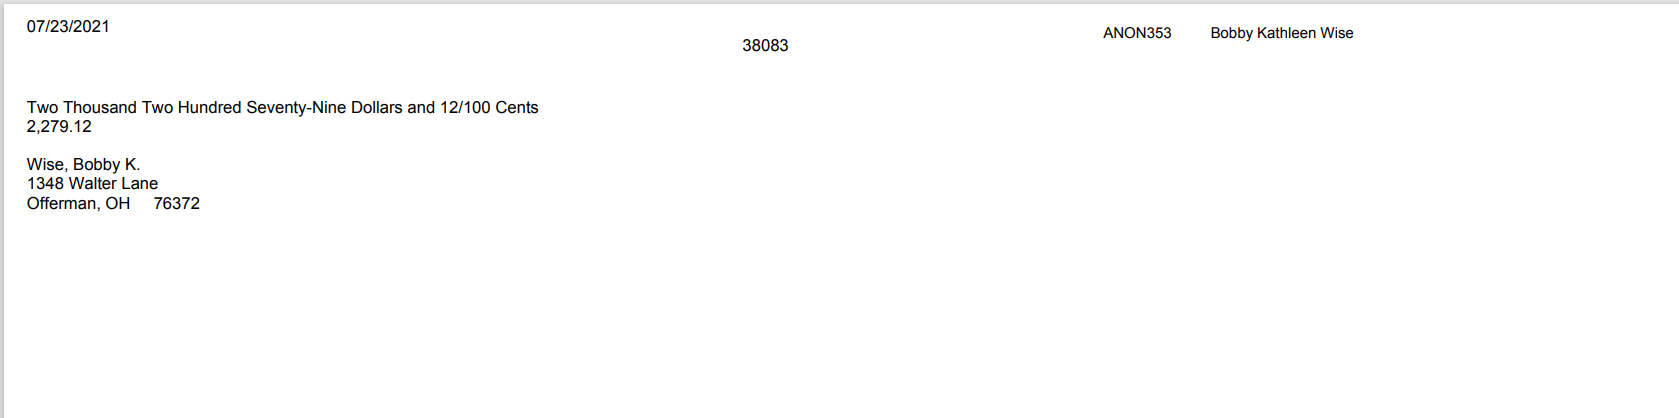
Check.PDF example

The Direct Deposit will show as Voided:

The Payroll Payment Checks will show the new Check Number but the same Payment Number:

Partial Direct Deposit Return
If an employee's partial Direct Deposit was returned, it can be reissued as a Check or resubmitted as a Direct Deposit to the employee's correct Account number:
Partial return as a Check
To reissue the partial return as a Check, find or Payment Number and click on the box next to that Payment the employee and click on Reissue under the Direct Deposit tab:
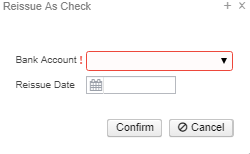
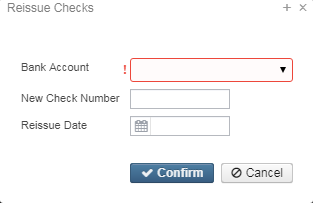
Select Bank Account from the drop-down box and enter a Reissue Date:
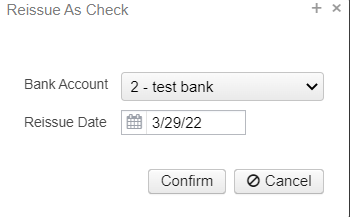
and click on Confirm to create a new check or Cancel to exit without creating a new check. Select the Payroll check and click on Print:

Enter in the Printing selections:
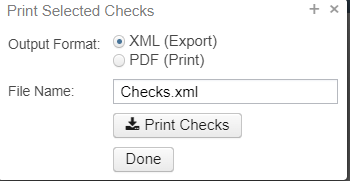
Print Selected Checks options:
Output Format: .XML (Export)
.PDF (Print)
File Name: Checks.xml
Checks.pdf
Form: Select from drop down what form file to use to print the check (Only for PDF Output Format)
Click on to create printing file or Done to exit out.
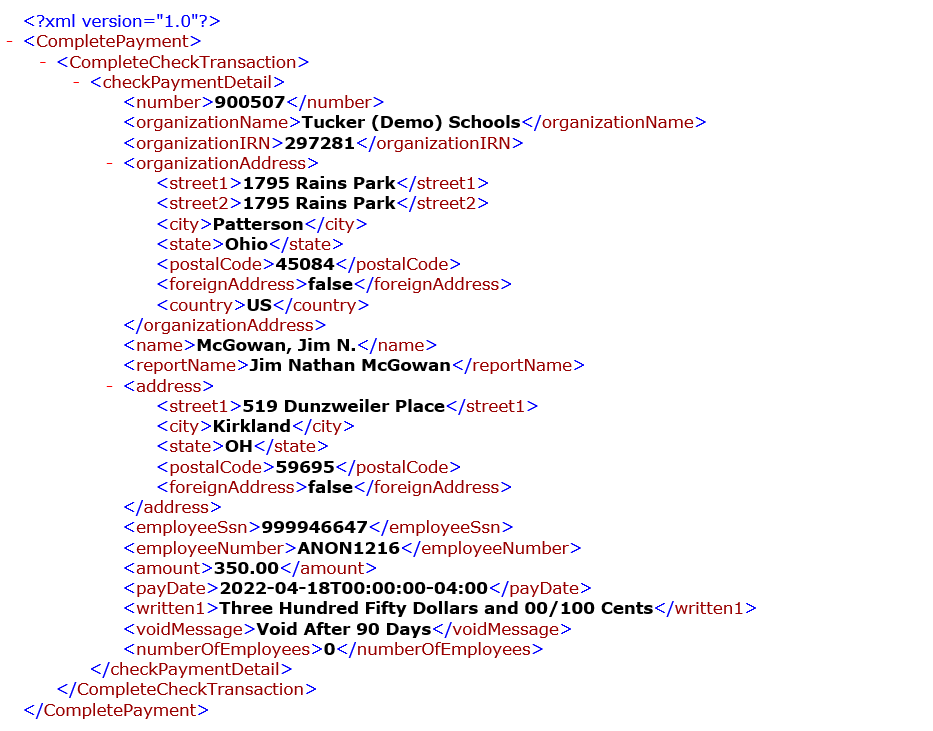
XML Format
PDF Format

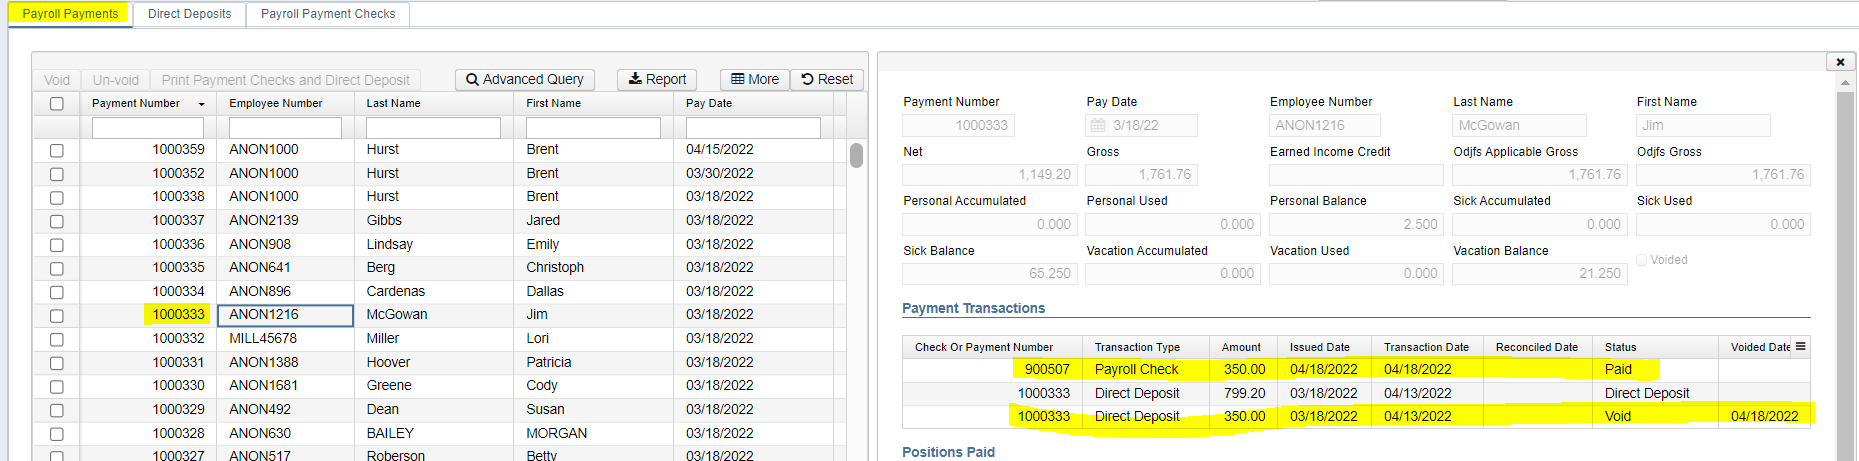
The Direct Deposit will show as voided under the Direct Deposit Tab:

And will now show under the Payroll Payment Checks tab with the same Payment Number and will now also have a Check Number:

Under the Payroll Payments tab, if you click on the employee, it will show the Payment Transactions for the employee:
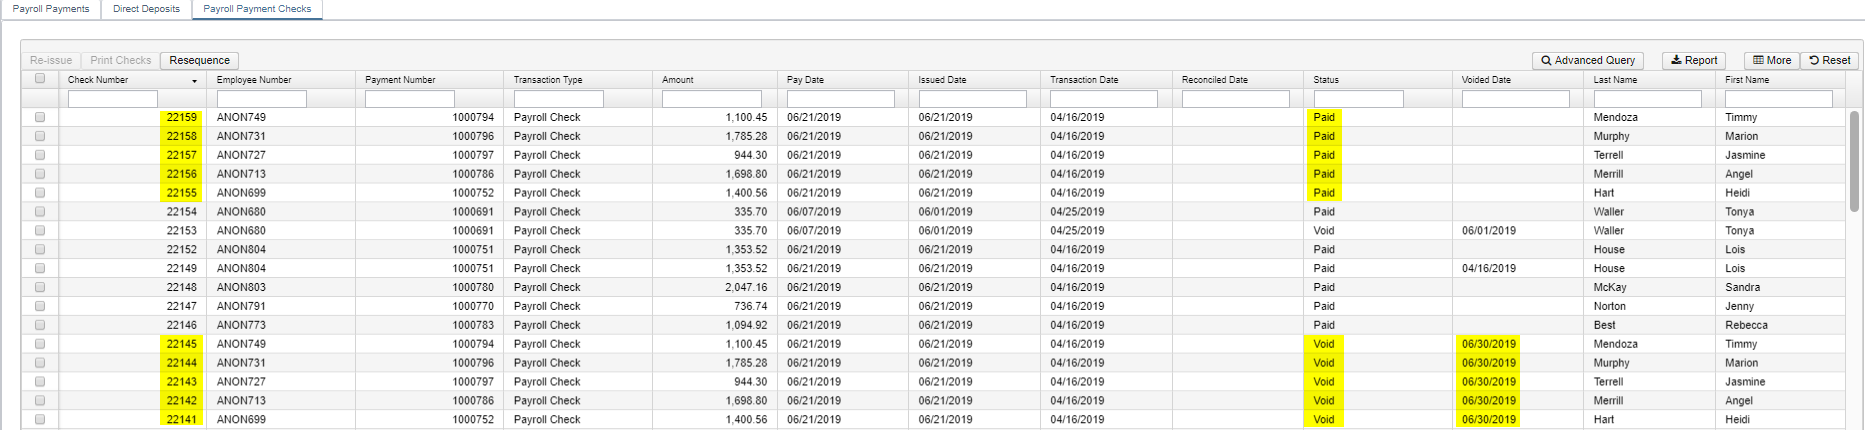
Payroll Payment Checks
Have the options to Re-issue, Print and Resequence checks.
Issue Date = Pay date
Transaction Date = System date
Pay date = Pay date from the payroll

Re-issue Payroll Payments
Select the check(s) to Void & Re-issue

The next available New Check Number will be used. If you click on the New Check Number box, it will bring up what Position this check was for. The Old check will be voided at this time. Select the Bank Account from the drop down box and enter in a Reissue Date and Click on Confirm or Cancel to Exit:


Print Checks
Select the 'Payroll Payment Checks'
Locate the check(s) you wish to print. Check the box next to the check(s) that will be created.
Click on the 'Print Checks'
This option will produce a check with payroll items paid listed.

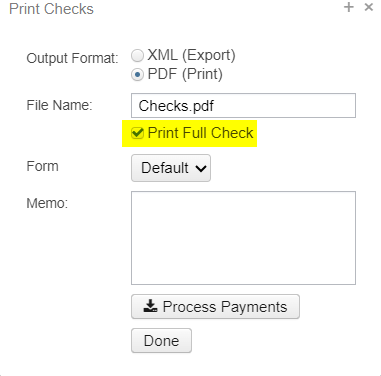
Output Format: XML (Export)
PDF (Print)
File Name: XML (Checks.xml)
PDF (Checks.pdf)
Print Full Check: ![]() if wanting to print employee's full check (click here for Check Reprinting Configuration setup)
if wanting to print employee's full check (click here for Check Reprinting Configuration setup)

Leave unchecked ![]() if not wanting to print employee full check
if not wanting to print employee full check
Check Form: Custom form can be used-Only is an option for PDF format
![]()
Optional to add a Memo line on the Check
Once all selections have been made, click on or to cancel select .
Example of a Payroll Payments Check .PDF

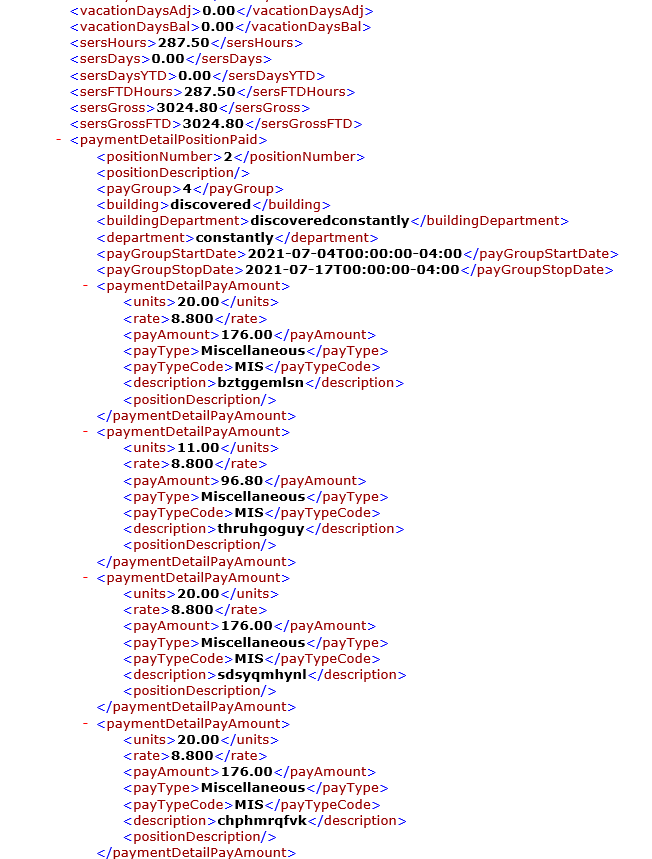
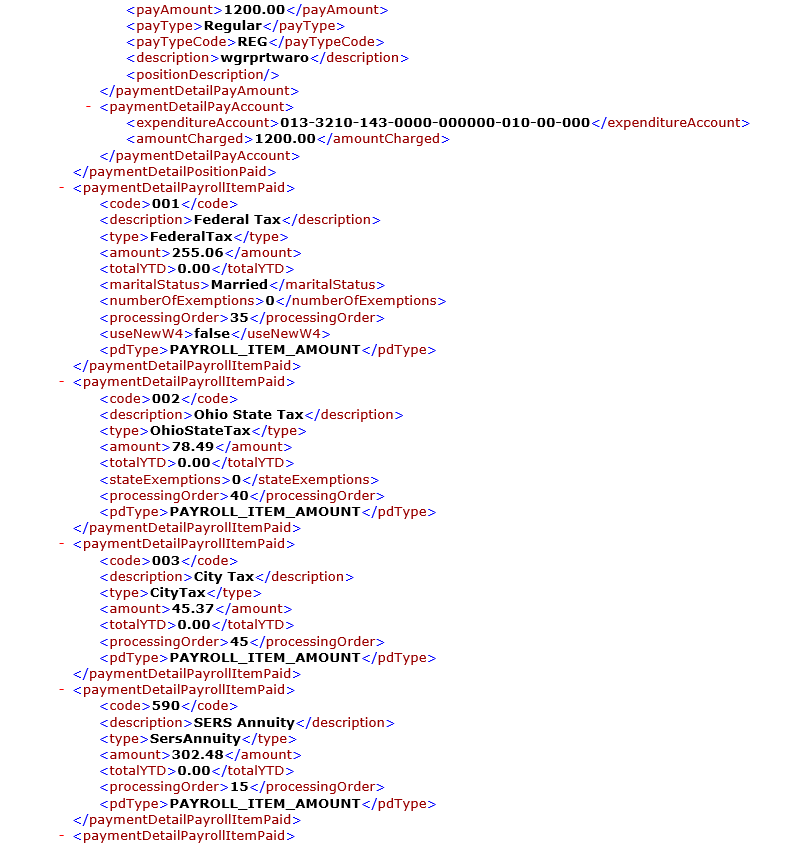
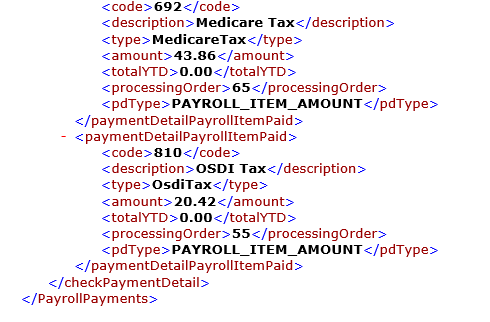
Example of the Payroll Payments Check .XML
 -
-

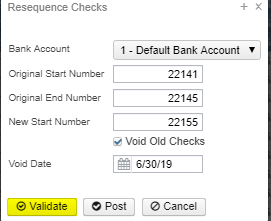
Resequence

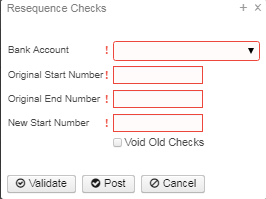
Enter in Original Start Number of bad checks. This is a required field.
Enter in Original End Number of bad checks. This is a required field.
Enter in the New Start Number. This is a required field.
There is an option to ![]() at the same time they are being Resequenced. If left unchecked, the bad checks will NOT be voided.
at the same time they are being Resequenced. If left unchecked, the bad checks will NOT be voided.
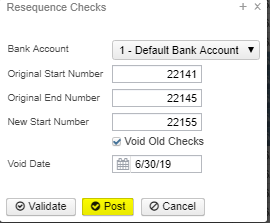
Once all data has been entered, select  ,
,  or
or  to Exit.
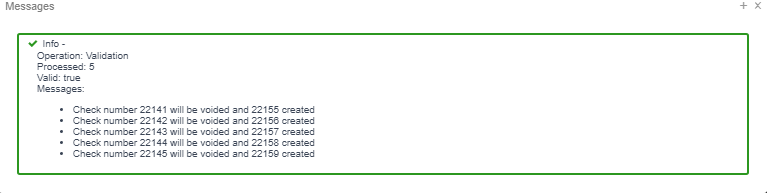
Once all data has been verified, select 
Report Creation
To create a report from the Grid, please click on the Report documentation link to find the How to Steps: Report
